Drywall Removal in Salt Lake Counties: What to Know
Removing drywall might sound simple—just tear it down, right? Not quite. If you want to avoid damaging studs, wiring, plumbing, or surrounding areas, you need to follow the best way to remove drywall carefully. Whether you're renovating a room or fixing damage, doing it the right way saves time, money, and frustration.
In this guide, you'll learn how to remove drywall, the safest techniques, and the fastest way to remove drywall without causing unnecessary mess or structural issues. If you're in Northern Utah, we'll also touch on professional options like Drywall Techs, who specialize in clean and efficient drywall removal.
Why Proper Drywall Removal Matters
Drywall removal isn't just about ripping panels off the wall. Done incorrectly, it can:
- Damage wall studs and framing
- Cut into electrical wiring or plumbing
- Create excessive dust and debris
- Increase repair and cleanup costs
Using the best way to remove drywall ensures your space stays intact and ready for the next phase of your project. If your removal is part of a larger renovation, our remodeling services can handle every step from demolition through finishing.
Tools You'll Need Before You Start
Before learning how to remove drywall, gather the right tools:
- Utility knife
- Pry bar or crowbar
- Hammer
- Reciprocating saw (optional for faster work)
- Screwdriver or drill
- Safety gear (gloves, goggles, dust mask)
- Drop cloths or plastic sheeting
Having these tools ready makes the process smoother and safer. The OSHA personal protective equipment guidelines are a great reference for choosing the right safety gear.
Step-by-Step: How to Remove Drywall Safely
1. Turn Off Utilities First
Before you begin, shut off:
- Electricity
- Water (if pipes are nearby)
This prevents accidents when cutting into walls. If you're unsure where wiring runs, the U.S. Department of Energy's home wiring overview is a useful safety primer.
2. Remove Fixtures and Trim
Take off:
- Outlet covers
- Switch plates
- Baseboards and moldings
This gives you clean access and prevents damage to reusable materials.
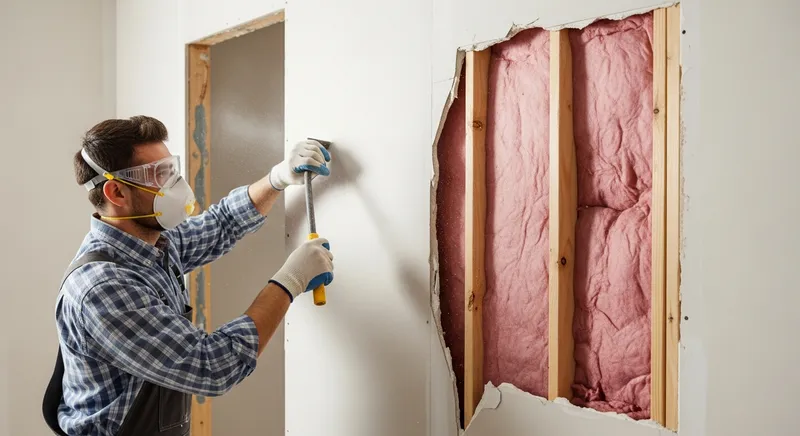
3. Score the Drywall
Use a utility knife to cut along seams and edges. This helps control how the drywall breaks and prevents tearing into adjacent surfaces.
4. Start with a Small Opening
Use a hammer to gently create a hole between studs. From there, insert a pry bar and begin loosening the drywall panel.
5. Pull Panels Carefully
Instead of smashing everything, remove drywall in sections:
- Work from top to bottom
- Pull panels away from studs
- Avoid damaging framing
This is key to following the best way to remove drywall without causing unnecessary repairs later. If you do nick a stud or cause drywall damage that needs patching, our team can handle the repair quickly.
6. Remove Nails or Screws
After panels are off, remove leftover fasteners from studs to prepare for new drywall installation.
Fastest Way to Remove Drywall (Without Making a Mess)
If speed is your priority, here's the fastest way to remove drywall while still staying safe:
- Use a reciprocating saw to cut large sections
- Remove entire sheets instead of breaking them into pieces
- Work in teams if possible
- Use heavy-duty trash bags or bins for quick cleanup
Keep in mind: Faster doesn't always mean better. If you're not careful, you could damage wiring or framing.
Common Mistakes to Avoid
When learning how to remove drywall, avoid these common errors:
- Tearing drywall without checking for wires or pipes
- Skipping safety gear
- Breaking drywall into tiny pieces (creates more mess)
- Damaging studs or insulation
- Not preparing for dust control
Avoiding these mistakes ensures a smoother project and better results.
DIY vs Professional Drywall Removal
When DIY Makes Sense:
- Small repairs
- Single wall removal
- No electrical or plumbing complications
When to Hire a Pro:
- Large-scale renovations
- Structural changes
- Water-damaged or moldy drywall (see our guide on warning signs of water damage behind walls)
- Tight timelines
Professionals like Drywall Techs provide clean and safe removal of old drywall, walls, and debris, especially for projects across Northern Utah and drywall removal Salt Lake Counties.
Hiring experts ensures:
- Faster completion
- Minimal damage
- Proper disposal
- Less stress for you
How to Minimize Dust During Drywall Removal
Drywall dust can spread quickly and cause respiratory issues. Here's how to control it:
- Seal off the work area with plastic sheeting
- Use a shop vacuum during removal
- Wear a dust mask or respirator
- Keep windows open for ventilation
Dust control is a big part of the best way to remove drywall, especially in occupied homes. The EPA's indoor air quality resources provide additional guidance on protecting your home's air during renovation work.
What to Do After Removing Drywall
Once the drywall is removed:
- Inspect studs for damage
- Check insulation condition
- Look for mold or moisture issues
- Prepare the surface for new drywall installation
This step ensures your next phase goes smoothly.
Drywall Removal in Salt Lake Counties: What to Expect
If you're located in Northern Utah, including drywall removal Salt Lake Counties, professional services can save you time and effort.
Typical process includes:
- Site inspection
- Safe demolition
- Debris removal
- Surface preparation
Companies like Drywall Techs specialize in efficient, clean removal—ideal for homeowners and contractors throughout Salt Lake City, Sandy, Draper, and surrounding areas who want reliable results.
Pro Tips for Cleaner and Safer Removal
- Remove drywall in large sections instead of smashing it
- Always check behind walls before cutting
- Label wires if exposed
- Use proper disposal methods
- Work slowly around corners and ceilings
These small steps make a big difference in achieving the best way to remove drywall.
Final Thoughts
The best way to remove drywall isn't about brute force—it's about precision, safety, and efficiency. Whether you're tackling a small DIY project or a full renovation, following the right steps will help you avoid costly mistakes.
If you're dealing with a larger project or want a hassle-free experience, professional services—especially for drywall removal Salt Lake Counties—can make all the difference.
Ready to start your project? Drywall Techs & General Contracting offers professional drywall removal, demolition, and installation throughout Northern Utah. Contact us today for a free quote or call (801) 791-9053 to discuss your project.
Frequently Asked Questions
What is the best way to remove drywall without damaging studs?
The best method is to score seams with a utility knife, create a small opening between studs with a hammer, and carefully pry panels off with a pry bar instead of forcefully breaking them. Working from top to bottom in large sections protects the framing and reduces cleanup.
How long does it take to remove drywall?
A single room can take 2-6 hours depending on size, tools, and experience. Larger renovations or projects with multiple rooms may take 1-3 days, especially when dust containment and proper disposal are required.
Can I remove drywall by myself?
Yes, for small projects like single walls or minor repairs. However, larger or complex jobs—especially those involving electrical, plumbing, or potential mold—are better handled by professionals like Drywall Techs to avoid costly mistakes and safety risks.
What is the fastest way to remove drywall?
Using power tools like a reciprocating saw to cut large sections and removing entire sheets at once speeds up the process significantly. However, this approach requires extra caution to avoid hitting wiring, plumbing, or damaging the wall studs behind the drywall.
Should I hire a professional for drywall removal in Salt Lake Counties?
If your project involves wiring, plumbing, water damage, mold, or large areas, hiring experts like Drywall Techs is highly recommended. Professionals serving Salt Lake County, Davis County, and Weber County provide proper containment, disposal, and surface prep for the next phase.